Squeeze the last out of the Indian Summer by using the golden light of the evenings to beautifully backlight outdoor portraits. I wrote this guide for issue 23 of N-Photo magazine and digitalcameraworld.com.

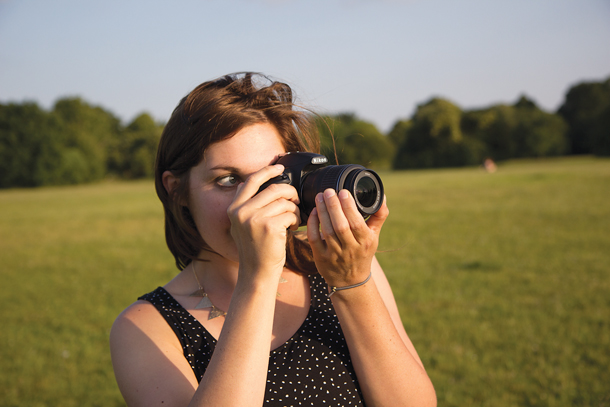
Using the sun as a natural light source is a really effective to add a sunskissed, dreamy feel to outdoor portraits, and it’s ridiculously simple. You’ll need to wait until late in the evening on a sunshiney day so that the sun is level with your subject and has taken on a warm golden glow.
My super patient friend Athene and I waited until 8pm for these shots – Athene’s long blonde hair is ideal for this tutorial, as the sun shines through and lights up fair hair really well.
For more quick and easy tutorials, check out nphotomag.com and digitalcameraworld.com.
1. Switch to manual
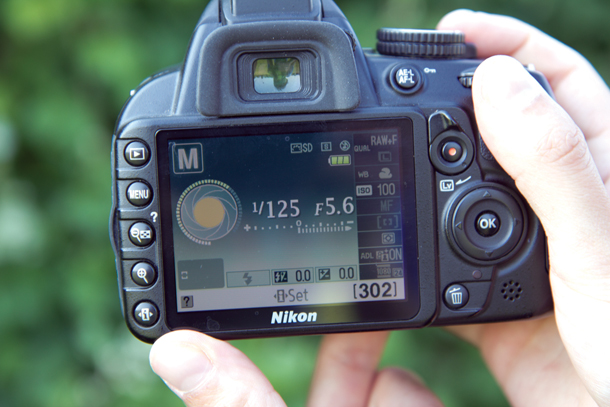
Manual avoids your camera overcompensating for the light and silhouetting your model. A wide aperture, such as f/5.6, creates shallow depth of field, and ISO100 is fine. Experiment with shutter speed – I found overexposing two stops with a setting of 1/125 sec gave just enough definition.
2. Get in focus
Shooting into the sun means autofocus will struggle. One trick is to shield your lens from the sun with your hand, focus on your subject’s face, then take your hand away and shoot, but it’s less hassle to focus manually. Remember, do not look through your viewfinder directly at the sun.
3. Find the right angle
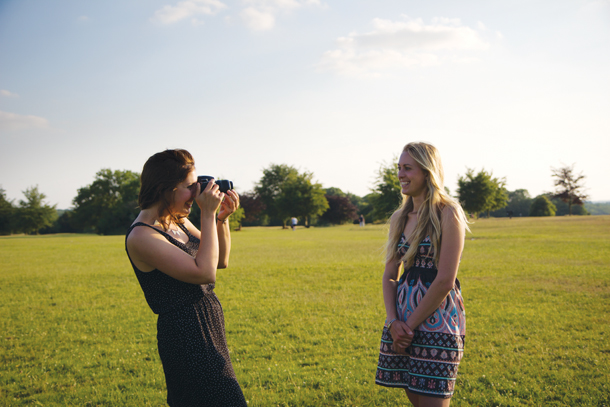
To avoid blowing out your photo, and to keep your subject’s features defined, you’ll need most of the sun behind your model’s head. Experiment with positioning and camera settings until you find an effect you like – and don’t worry about lens flare as it can create an attractive sunbeam look.