Taking portrait photos is one of my favourite things about my day job, so I had a very nice time writing this beginner’s guide to reportage-style people pictures for issue 26 of N-Photo magazine and for digitalcameraworld.com. These shots are of the lovely baristas at the Society Cafe in Bath, but environmental portraiture is perfect for the great outdoors too – try shooting surfers with their boards, climbers gearing up or just your mates on a country walk.
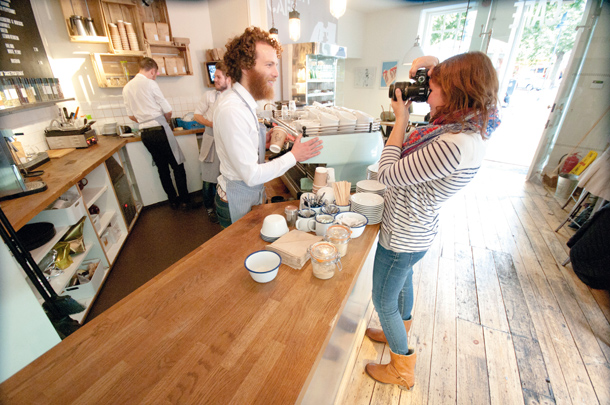

Environmental portraits are shots of people taken in their natural surroundings, the places where they live, work or play. It’s a favourite of the Sunday supplements and lifestyle blogs, probably because including background detail and elements of someone’s environment tells more of their story than a plain portrait shot. It’s also perfect for shooting sports personalities and adventurers – we’re all far more relaxed in our everyday surroundings, so it’s easier to get great natural poses.
The key to getting environmental portrait photography right is finding a good balance between your subject and their background. The person is still the focus of the shot, and their surroundings are just there to add interest and hint at their personality.
SIX TIPS FOR BETTER REPORTAGE PORTRAITS
1. Get set

You’ll need to shoot handheld and be prepared to move quickly to grab great shots in a busy working environment or out in the elements, so shooting in Manual might not be the best choice. Switch to A mode – you’ll have control over your aperture and the camera will take care of other settings for you. A higher ISO like 1600 will compensate for low light.
2. Go candid

Warm up by snapping some candid shots of your subject going about their normal routine. Try not to be too intrusive, as the less your subject notices you’re there, the more relaxed they’ll feel. It takes people a few minutes to stop feeling awkward in front of a camera.
3. Add props

Add a prop to show more personality and to give your subject something to pose with, like Katie’s cake. This is also a great solution if you’re working with an uninspiring background; tools of the trade or even pieces of kit instantly add interest and detail. If the background feels too busy, dial down to an f-stop like f/3.5.
4. Simple monochrome

Further enhance the reportage feel by converting your photo to monochrome in post-production. Black-and-white has timeless appeal and is also a great way to make a busy shot like this one more restful to look at.
5. Widen up

For a different look, whip a wide-angle lens like my Sigma 10-20mm out of your camera bag and try including more of the surroundings in the shot. This is an especially effective trick if there are other people milling around as you’ll be able to capture them all in one photo.
6. Find the light

If you’re shooting indoors, position your subject near a natural light source. I asked barista Alistair to pose next to the café’s window for a brighter final portrait, but another option in low light is to ask a friend to use a golden reflector to bounce more light onto your subject’s face.
For more quick and easy tutorials, check out nphotomag.com and digitalcameraworld.com.

